How to Make perfect
Face Mosaic in 120 Seconds
How to turn photo of face into face photo mosaic
1. Step - Download and install the Mosaic Creator
Mosaic Creator installation for MS Windows takes 2 minutes.
The free trial version allows you to test the functionality of the application.
2. Step - Load your photo with face
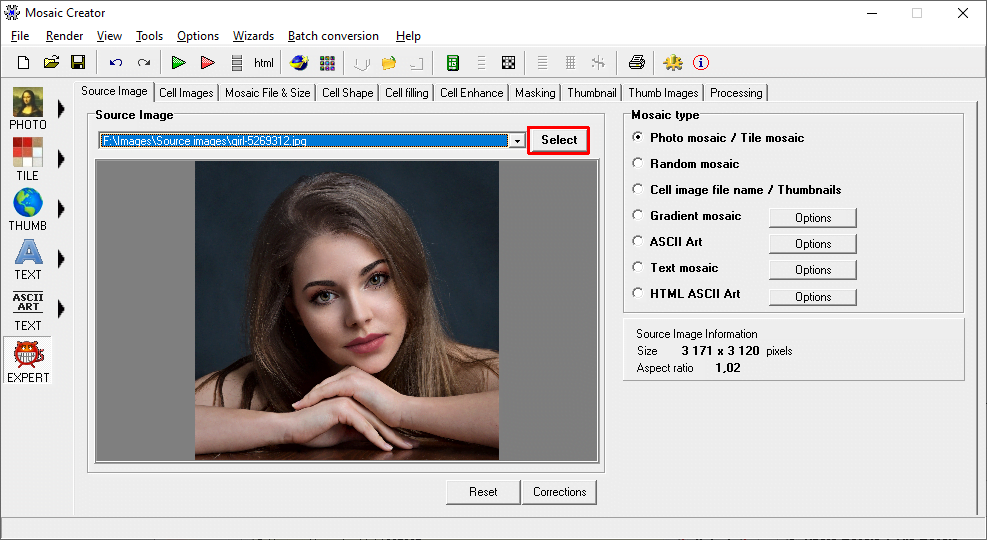
Open Mosaic Creator, close the Wizard window and select your photo which contains a face.
The main mosaic picture is named as the source image.
Click Select button and choose your image file.
3. Step - Select part of image
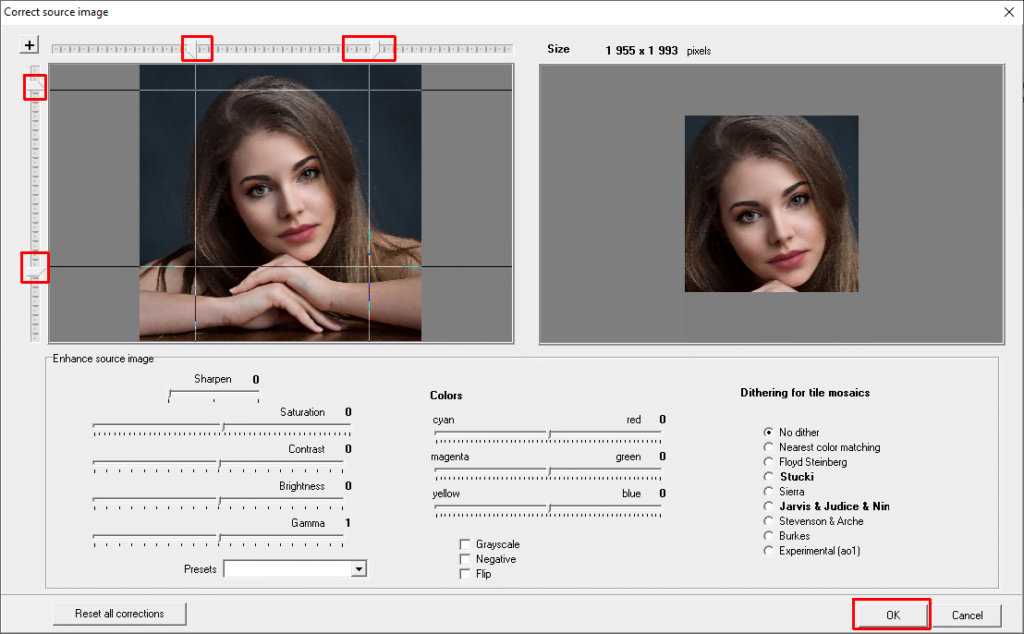
Click button Corrections below Source image.
Move sliders on left side to select part of image you want to use. You see selected part on the right side.
Click OK button on the bottom right to confirm selection.
4. Step - Load pictures for mosaic
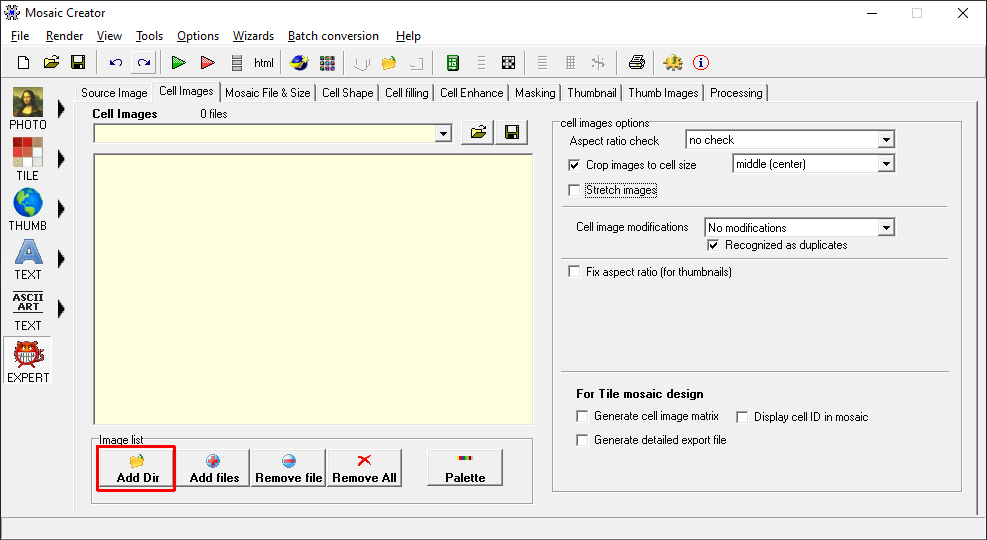
Click the second tab Cell images and Select directory with your pictures.
You can use any pictures. For mosaic from the face are good images which contain skin color, for example faces.
Click Add Dir button to select directory with images or click Add files button to select images individually.
5. Step - Set the size of mosaic
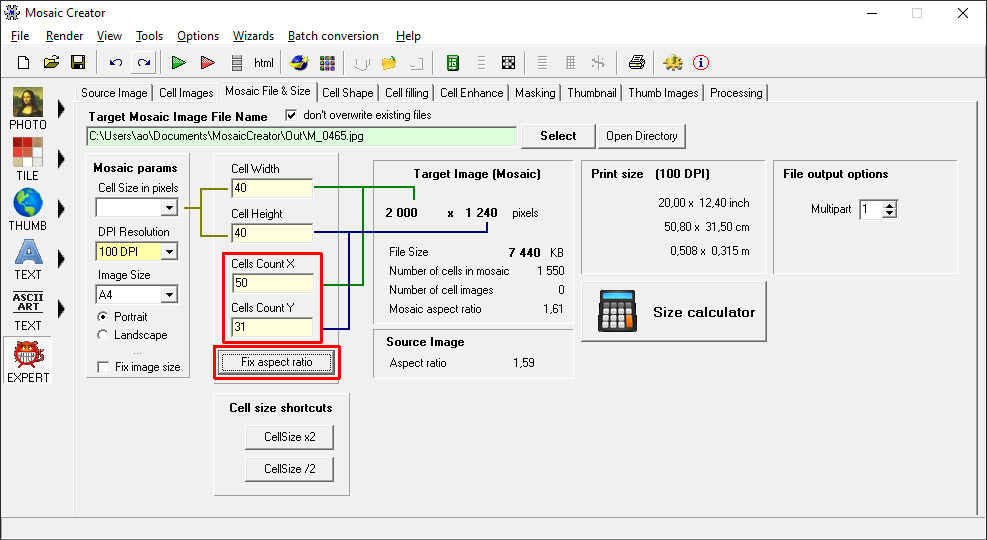
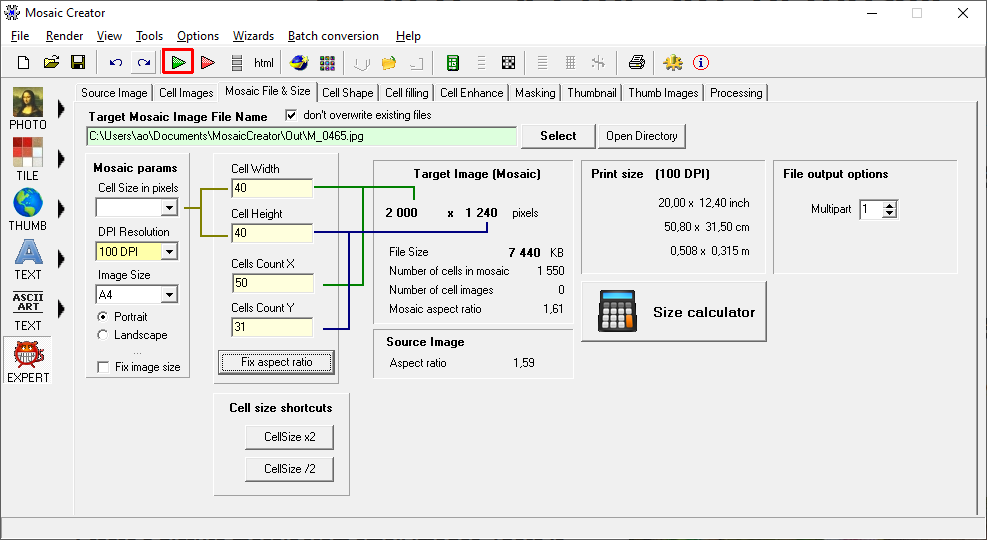
Click the third tab Mosaic File & Size.
You can set the size of the mosaic if you want different settings as default.
Cell Count X is number of images in row, Cell Count Y is number of images in column.
Cell Width is size of tile width in pixels, Cell Height is size of tile height in pixels.
You can click Fix aspect ratio button to correct number of cells for your source image.
6. Step - Render your face photo mosaic
Click the green play button in the top toolbar to generate your photo mosaic.
7. Step - Display your result mosaic
When the photo mosaic render is finished, the image is saved to disk.
You can open it in any image viewer or graphics editor.
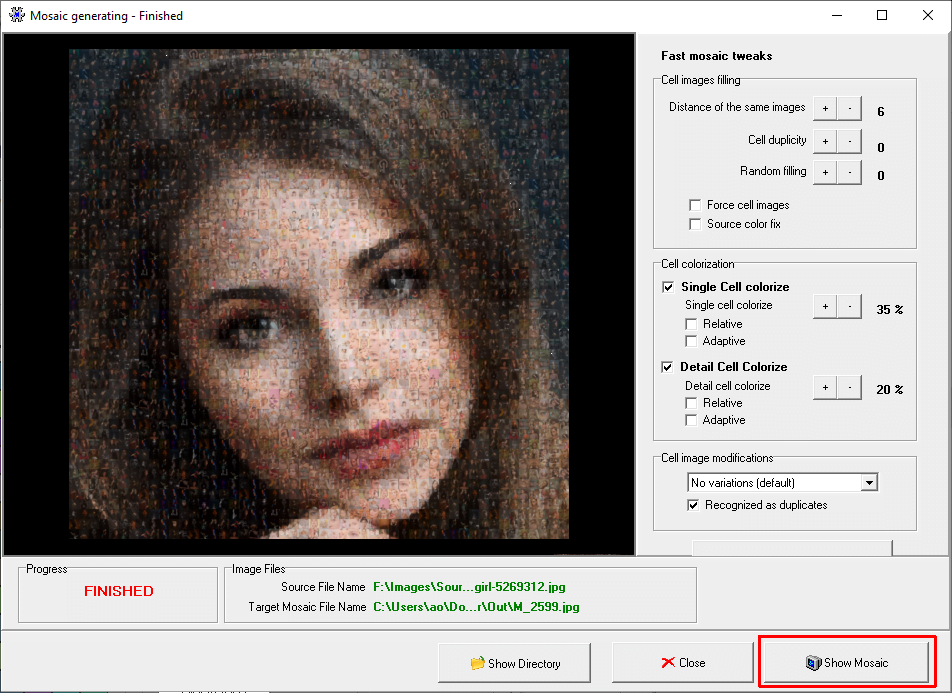
Small preview of your photo mosaic is visible Mosaic generating window.
Click Show Mosaic button to display result mosaic picture.
Click Show Directory button to show content of directory with rendered mosaics in Windows Explorer.
More photo mosaic tweaks
You can tweak your mosaic settings, change mosaic resolution and improve color enhancements.
Change color enhancements
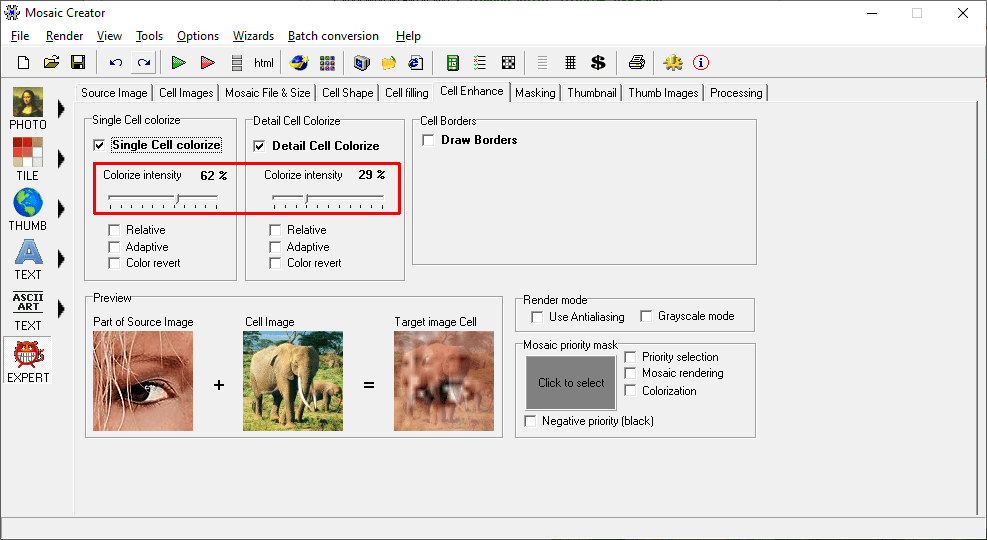
Click tab Cell enhance and change values for single and detail cell colorization.
If you want to display more details of the face, increase detail cell colorize.
If you want to display more details for images in mosaic, decrease detail cell colorize.
Render mosaic again.
Change mosaic pattern
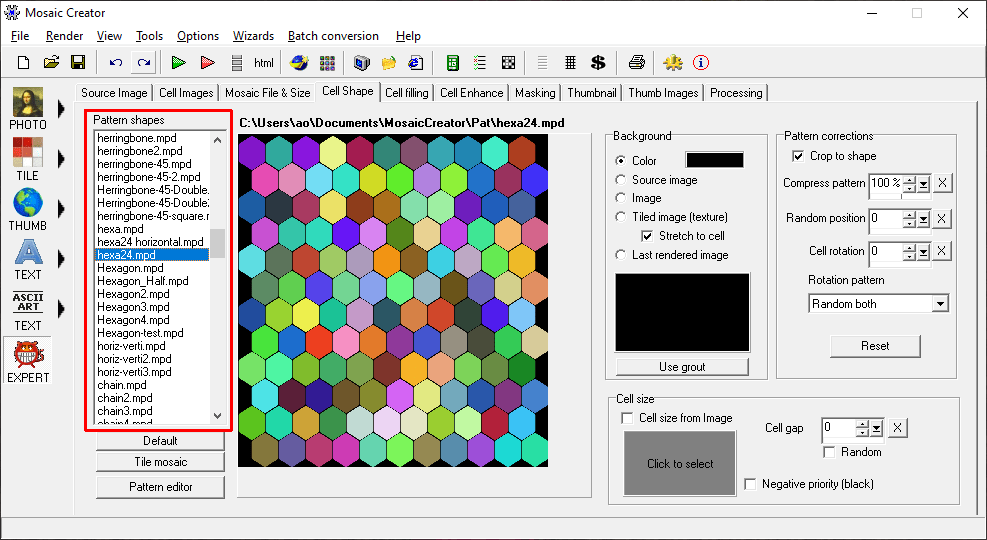
For some types of photos it may be better to use some other than a standard rectangle/square pattern.
Click tab Cell shape and select other patterns from the list. Then render mosaic again.
Use visual undo/redo feature

You can use visual undo/redo buttons in the top toolbar to easily change the last configurations of your photo mosaic.
If you stay with the mouse cursor on undo/redo button, you will see a preview of rendered mosaic.
Create multi-size tile photo mosaic
Adaptive tile size mosaic
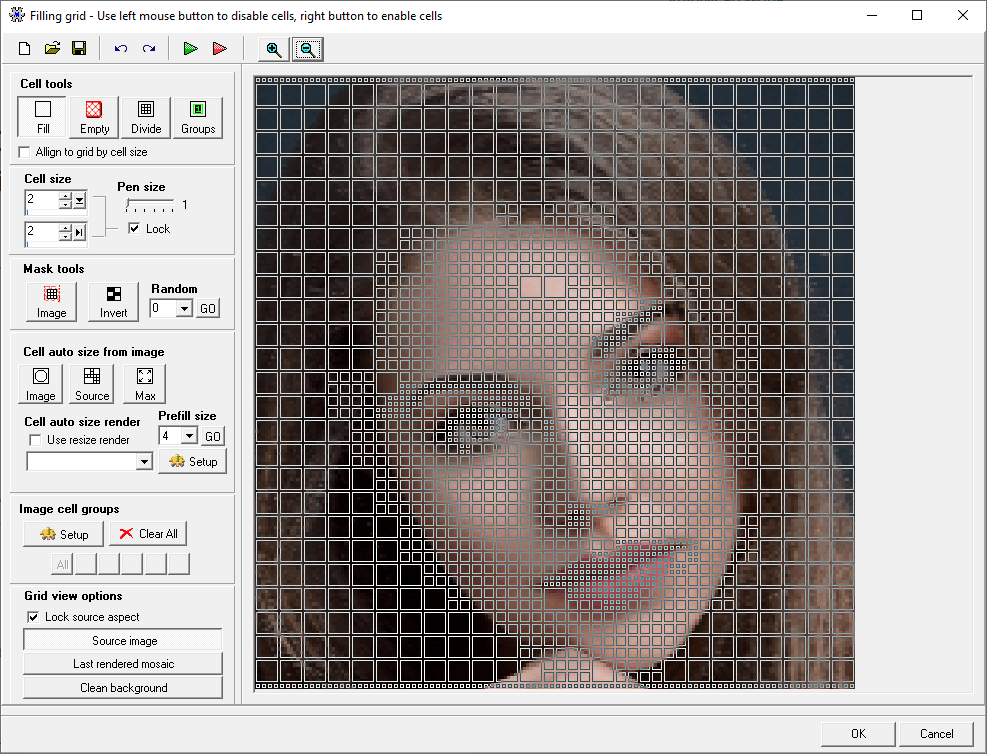
You can edit tile/cell size manually. Click Tools/Filling grid in main menu.
Select Prefill size and click Go button. Whole mosaic will be prefilled with defined size.
Then select Divide tool on the top left. You can divide cells with left mouse when you moving over mosaic grid. Parts of face with more details as eye and mouth should be covered with smaller tiles to allow to bring more details.
Color tweak for the source image
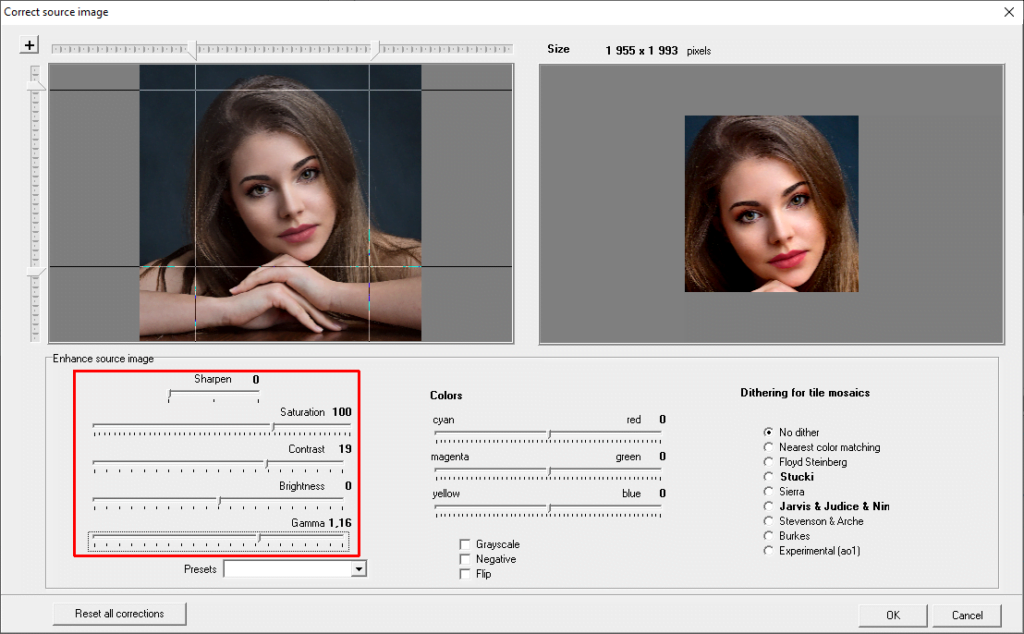
You can tweak all basic color settings in Source correction window (page Source Image, button Corrections).
It is recommended to increase the contrast value. Change the gamma setting if the image contains dark parts.
If you want the resulting mosaic to contain vivid colors, it is advisable to increase the saturation value.
What is a Face Mosaic?
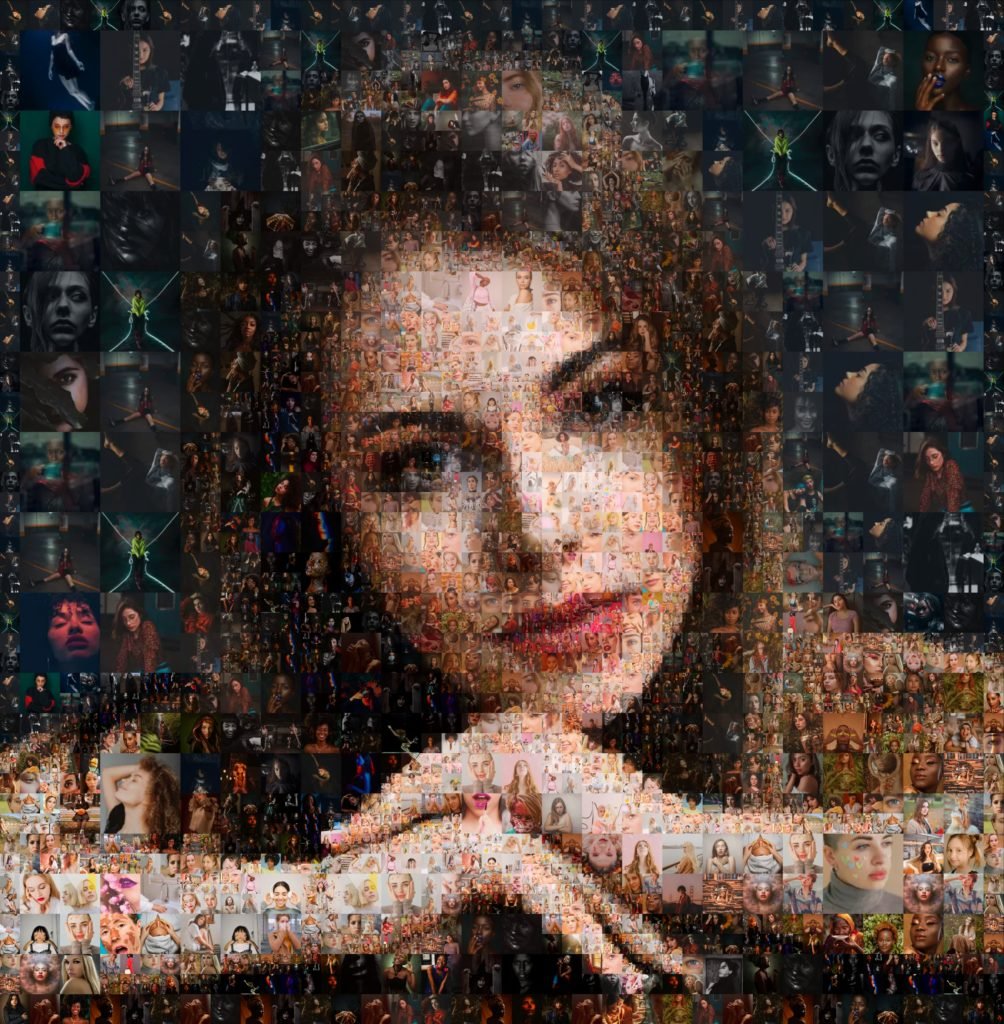
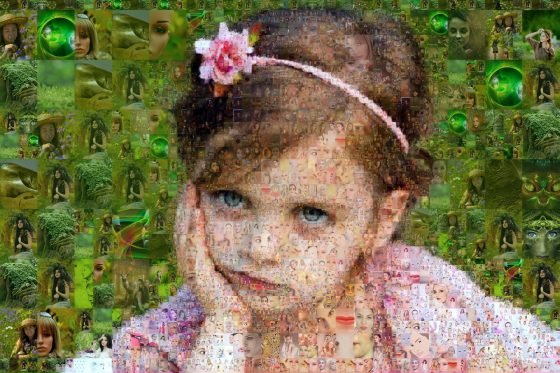
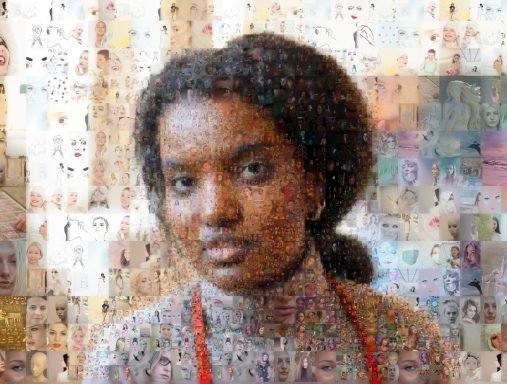
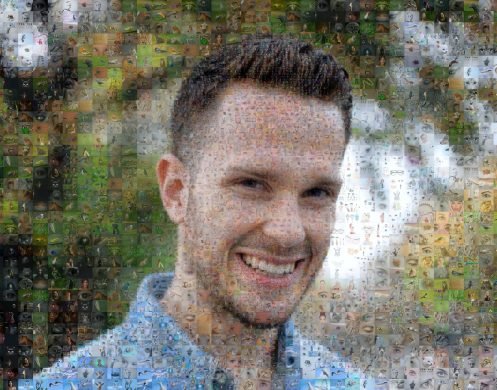
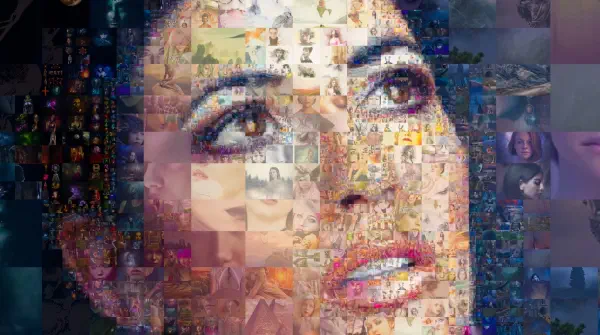
A face mosaic is a type of photo mosaic when a face is created using a collection of individual photographs. These photographs are arranged in a specific pattern to create a larger image – face.
The individual photographs used in a face mosaic can be of anything, but they are typically chosen for their color and composition. The best results are obtained from images with a color similar to the skin color.
What is photo mosaic?
How can I create mosaic from photo?
You need your source photo and photos or any images and software to make picture mosaics.
With the more images, you can get a more detailed face photo mosaic.
How to use photo mosaic?
Print photo mosaic
Print picture mosaic as any other photo on the paper and hang it on the wall.
Bigger is better. Photo paper print is better than a print on fabric.
Publish photo mosaic online
- Zoomable.ca – Sample photo mosaic
Why Mosaic Creator software?
Mosaic Creator is a great software for creating photo mosaics. It is easy to use and has a user-friendly interface. The software allows you to create a mosaic using a single image or multiple images, and you can customize the size and shape of the mosaic to fit your needs.
The software offers a wide range of features, including the ability to adjust the color and brightness of your mosaic, add borders, and save your final mosaic in a variety of image formats. Mosaic Creator is an excellent tool for anyone looking to create beautiful, unique photo mosaics.
Mosaic Creator software is an excellent tool for creating photo mosaics from a any picture. Here are some reasons why Mosaic Creator may be the best choice for this task:
Customization options: Mosaic Creator offers a variety of customization options that make it easy to create a mosaic that reflects your visual requirements. You can choose the layout, pattern, and size of the mosaic.
High-quality output: Mosaic Creator produces high-quality mosaic images that are perfect for printing or sharing digitally. The software allows you to save your mosaic in a variety of sizes and resolutions, so you can choose the best option for your needs.
Wide range of supported file formats: Mosaic Creator supports a wide range of input file formats, so you can use a variety of images in your mosaic. This includes popular formats such as JPG, PNG and WEBP, as well as more specialized formats like TIFF.
Q & A
A good starting point is a few hundred pictures, better is a few thousand of pictures. More important than numbers is the content of pictures. Pictures with many details are not as good as pictures with fewer details like portraits. If you don’t have these pictures, you can crop existing pictures into multiple new pictures.
Do I need large pictures?
No, you can use any pictures in a resolution greater than 600×600 pixels, it is the picture resolution of every legacy digital camera. All-new cameras including smartphones produce good picture quality for picture mosaics. You can use smaller images too, but then you need to use more tiles in a mosaic.


The Most Advanced photo mosaic software
Mosaic Creator features
Mosaic Wizzard
Select mosaic type and easy set mosaic configuration
Mosaic calculator
Mosaic size calculator for printed or physical mosaics
Color enhancements
Custom settings for color improvements
Mosaic filling options
Full control over mosaic tile filling - distance and repetition
60+ patterns
Patterns ready for use and pattern editor
Video mosaics
Unique features for photo mosaic rendering
High resolution output
Mosaic rendering in high resolution for poster print
Filling grid editor
Control mosaic filling with multi-size tile support
Random mosaic
Generate randomly filled mosaics
Download Mosaic Creator
Mosaic Creator is shareware with 30 days trial period. Output image file size is limited to 20 MB in the trial version.
Unregistered software superimposes the name of the program onto the bottom-left corner of the images. If you plan to continue using the program after that period, you must register.
For more information see Purchasing & registering help
System requirements
- MS Windows 7/8/10
- Minimum 2 GB RAM
- 30 MB disk space for program and additional files
- Minimum 500 MB storage for rendered result images


