|
| What you need to create new mosaic pattern? |
|
| Basic steps |
- prepare new mosaic pattern
- divide pattern into basic shapes
- draw monochrome mask images for every basic shape in graphic editor
- edit pattern in Mosaic Creator Pattern editor
|
| Detail design process |
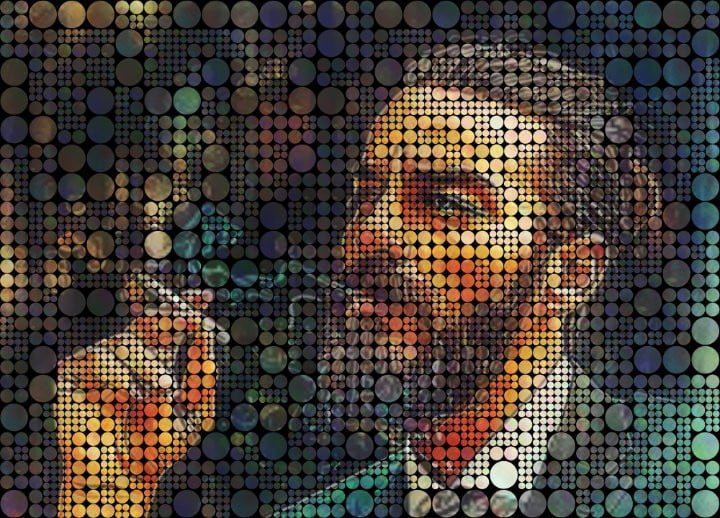
Step 1 – prepare mosaic patern Now will be design process explained on example. This is our target mosaic pattern. One big square and 4 small squares. You can download files for example. File description: | i1.bmp – i5.bmp are masks for pattern definition | | testPat.mpd – result pattern definition | | testRes.jpg – sample mosaic result | | |
|  | Step 2 – divide pattern into basic shapes Basic shapes are parts of result mosaic which can fill mosaic space. In our example basic shapes are – big square and four small squares. This example is easy to specify basic shapes. Main rules for set minimal set of basic shapes are: - every basic shape must have different shape
- cardinal for basic shapes is position of visible part on image mask
Mosaic is calculated line by line and pattern by pattern in every line. You can use overlap patterns to get unique mosaic patterns. | Step 3 – draw monochrome mask images For every basic shape you must draw image with transparent and non-transparent areas. Nontransparent areas are displayed on result mosaic and filled with cell image or overlaped with next pattern. Transparent areas don’t modify background which consist of drawed patterns (previous line of patterns and previous pattern in same line) 
Use your favorite image editor for drawing masks for every basic shape. The best results you gets if every mask will be square image. Maximal size of mask image is 600×600 pixels. Masks must be saved as monochrome bitmap (.BMP) images. White areas are transparent, black are displayed. Images on our sample has names i1.bmp, i2.bmp, i3.bmp, i4.bmp and i5.bmp. | Step 4 – edit pattern in Mosaic Creator Pattern editor This step is difficulty for user ability. Run Mosaic Creator, Click on Pattern editor button in Cell Shape page. Mosaic Pattern definition window displays. | Mosaic pattern definition window On the right side is Pattern definition tree, on the left side is property editor for selected node in pattern tree. Use right click on pattern tree to add or remove nodes. Available items on displayed popup menu are relative to selected node type. There are four levels of nodes. First is Line Group, next Line, Pattern Group and last Pattern. Mosaic definition consist from defined Lines and every Line consist of any number of Patterns. Level Line Group and Pattern Group are proposed to get unique patterns with using Repeat or Random properties for this levels. |  | | Now we can continue with example. Our pattern tree is empty. Use right click to open popup menu and select Add Line Group. Next use right click to add Line. Next use right click to Pattern Group and the last add Pattern node. This is standard way to create empty four level tree. If you have selected Pattern node, yellow box is displayed on right bottom. This image displays image mask for selected Pattern. Click on yellow box to set or change mask image. (select im1.bmp) Image mask for Pattern is loaded. On the left side of image are main parameters for setting Pattern. There are four available values. They specify two points, begin offset and end offset (offset X, offsetY and offset XE, offsetYE). You can set any value in range 1-200. Red rectangle diplays actual settings where start offset is top left point and end offset is bottom right point. For our example please set values to 1, 1, 200, 200. | | Now we can save pattern defintion. Click menu File/Save and set name for edited pattern (fe. test) Click menu Test/Show Result and prepared pattern will be displayed. Our pattern definition is not complete, only standart square pattern is diplayed. NOTE – before use function Test/Show Result, edited pattern must be saved ! | | For finish example, close Test window and use right click on Pattern tree to add next Pattern node. Click on yellow image and set image mask (i2.bmp). Set offset parameters to 1, 1, 1, 200. Repeat this, add Pattern node and set image mask (i3.mbp) and next (i4.bmp). Now we can add last Pattern node and mask (i5.bmp) and set offset parameters to 1, 1, 200, 200. Save Pattern definition and try view result. Result cell are not squares but this problem can be eliminated with changed cell size parameters. |  |
|
| Node properties |
| |
Description of offsets for Pattern nodes | Every Pattern node has defined two points.Begin offset and end offset (offset X, offsetY and offset XE, offsetYE). You can set any value in range 1-200 (this is like percentual value with 0.5% step). Red rectangle diplays actual settings where start offset is top left point and end offset is bottom right point. This values are meanfull for rendering process. We can explain this values on example. | | | | | We will be talking about light blue square. This is description how will be image mask placed on target mosaic. Every pattern (displayed as squares) has defined begin and end offset points. Result position of blue pattern is based on three points. End offset points of previous patterns in the same row and column (green patterns) and begin offset of blue pattern. Result position is calculated on this way. | | | | Blue-violet sqare is moved to correct possition of begin and end offsets on row and column. Result of this is that Blue square overlaps previous drawed patterns. Visibility of cell images is specified with mask image. If you don’t need overlap patterns, you must specify end offset to max value (200, 200) and begin offset to minimal value (1, 1). If you want to overlap patterns, you have three ways to do this. - Set end offset to max and begin offset to necessary value.
- Set end offset to (200-necessary valu) and begin offset to minimum
- Set end offset and begin offset to values that gets necessary value
| |
| Offset definition examples | | This are available values to get half overlap with previous pattern in the same row. - green pattern offset XE = 100, red pattern offset X = 1
- green pattern offset XE = 1, red pattern offset X = 100
- green pattern offset XE = 150, red pattern offset X = 50
- green pattern offset XE = 120, red pattern offset X = 20
- …
|  | This are available values to get half overlap with previous pattern in the same column. - green pattern offset YE = 100, red pattern offset Y= 1
- green pattern offset YE = 1, red pattern offset Y= 100
- green pattern offset YE = 150, red pattern offset Y= 50
- green pattern offset YE = 130, red pattern offset Y= 30
- …
| | This are available values to get half overlap with previous pattern in the same column and row. - green pattern offset XE = 100, blue YE = 100, red pattern offset X= 1,Y=1
- green pattern offset XE = 1, blue YE = 1, red pattern offset X= 100,Y= 100
- green pattern offset XE = 100, blue YE = 1, red pattern offset X= 1,Y=100
- green pattern offset XE = 1, blue YE = 100, red pattern offset X= 100,Y=1
- green pattern offset XE = 150, blue YE = 150, red pattern offset X= 50,Y= 50
- green pattern offset XE = 120, blue YE = 120, red pattern offset X= 20,Y= 20
- green pattern offset XE = 150, blue YE = 120, red pattern offset X= 50,Y= 20
- …
| |
Pattern node – Property repeat count Repeat count specify number of repeated rendered pattern on result mosaic. Default value is 1. |
| |
Pattern Group Properties Repeat count specify number of repeated pattern group. Default value is 1. Every pattern in pattern group is rendered and repeated. Random property can randomize mosaic result, patterns in pattern group are shaked. Pattern group position can have 3 values – first, middle, and last. Middle value means that pattern group is rendered over entire mosaic. First – pattern group will be used only on first columns and Last – only on the final columns. |
| |
Line Properties Line property Repeat Count specify number of repeated Line in rendered mosaic. |
| |
Line Group Properties Repeat count specify number of repeated line group. Default value is 1. Every line in line group is rendered and repeated. Random property can randomize mosaic result, lines in line group are shaked. Line group position can have 3 values – first, middle, and last. Middle value means that line group is rendered over entire mosaic. First – line group will be used only on first rows and Last – only on the final rows. |